Browsing the Store Front
Browsing the Store Front
This guide is intended to be used as an introduction to the store front. The store front reveals how the customer views and interacts with the store.
Navigating the shop
The header
The header will be displayed at the top of the page, on every page of the store; not just the home page.

The header has the following navigation options:
- Store logo: Clicking on this logo will direct the customer back to the home page of the store.
- Currency block: The customer can select which currency the store's products will be in by clicking on any of the currency icons.
- Shopping Cart: Displays the number of items purchased, and the total price of the order. Clicking on the button will containing all of products added to the cart and an option to "View Cart" or "Checkout".
- Search box: The customers can type in the search box to search for a product within the store's product categories.
- Links: Links the customer to the Home page, Wish List, My Account, Shopping Cart, and Checkout.
- Telephone: Company telephone number.
- My Account: Customer can register or login from here.
The Footer
The footer is located at the bottom of every page, not just the Home Page. This block of miscellaneous links is useful in sorting relevant pages for the customer that may not logically sort anywhere else.
The organizational scheme of the footer can be divided into the following sections:
- Information: "About Us", "Delivery Information", "Privacy Policy", "Terms & Conditions"
- Customer Service: "Contact Us", "Returns", "Site Map"
- Extras: "Brands", "Gift Vouchers", "Affiliates", "Specials"
- My Account: "My Account", "Order History", "Wish List", "Newsletter"

Product pages
The product page will follow the structural format seen below.
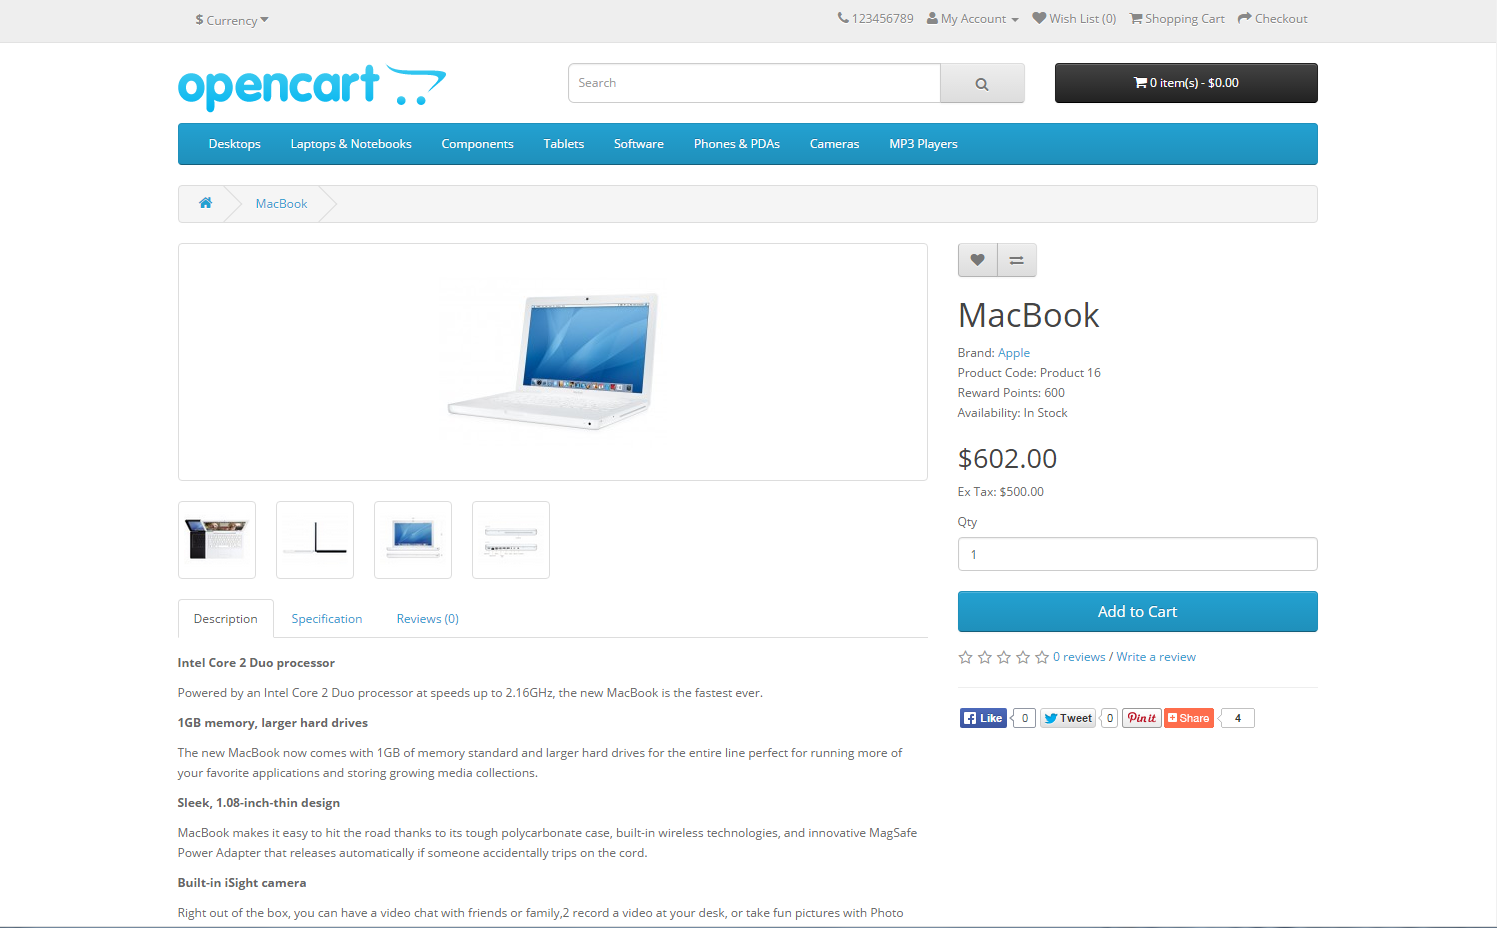
The product page can be divided into the following sections:
- Product image: The product image can be displayed under the title on the left-side, along with alternate views of the product underneath it in smaller box. Clicking on the main image will expand the image within the window for the customer to see it in greater detail.
- Product details: The product code, availability, and price are displayed just right to the product image.
- Cart: The customer can select a quantity and add the product to their cart, wishlist, or compare.
- Rating/Sharing: Underneath the cart can rate the product and/or share the product on different social media websites.
- Description tab: An area underneath the main product information to provide a detailed description of the product.
- Review tab: An area for the customer to write a review on the product.
Product compare
The "Add to Compare" feature in the product section allows the customer to compare the different specifications, features, and price of a number of products s/he might be interested in.
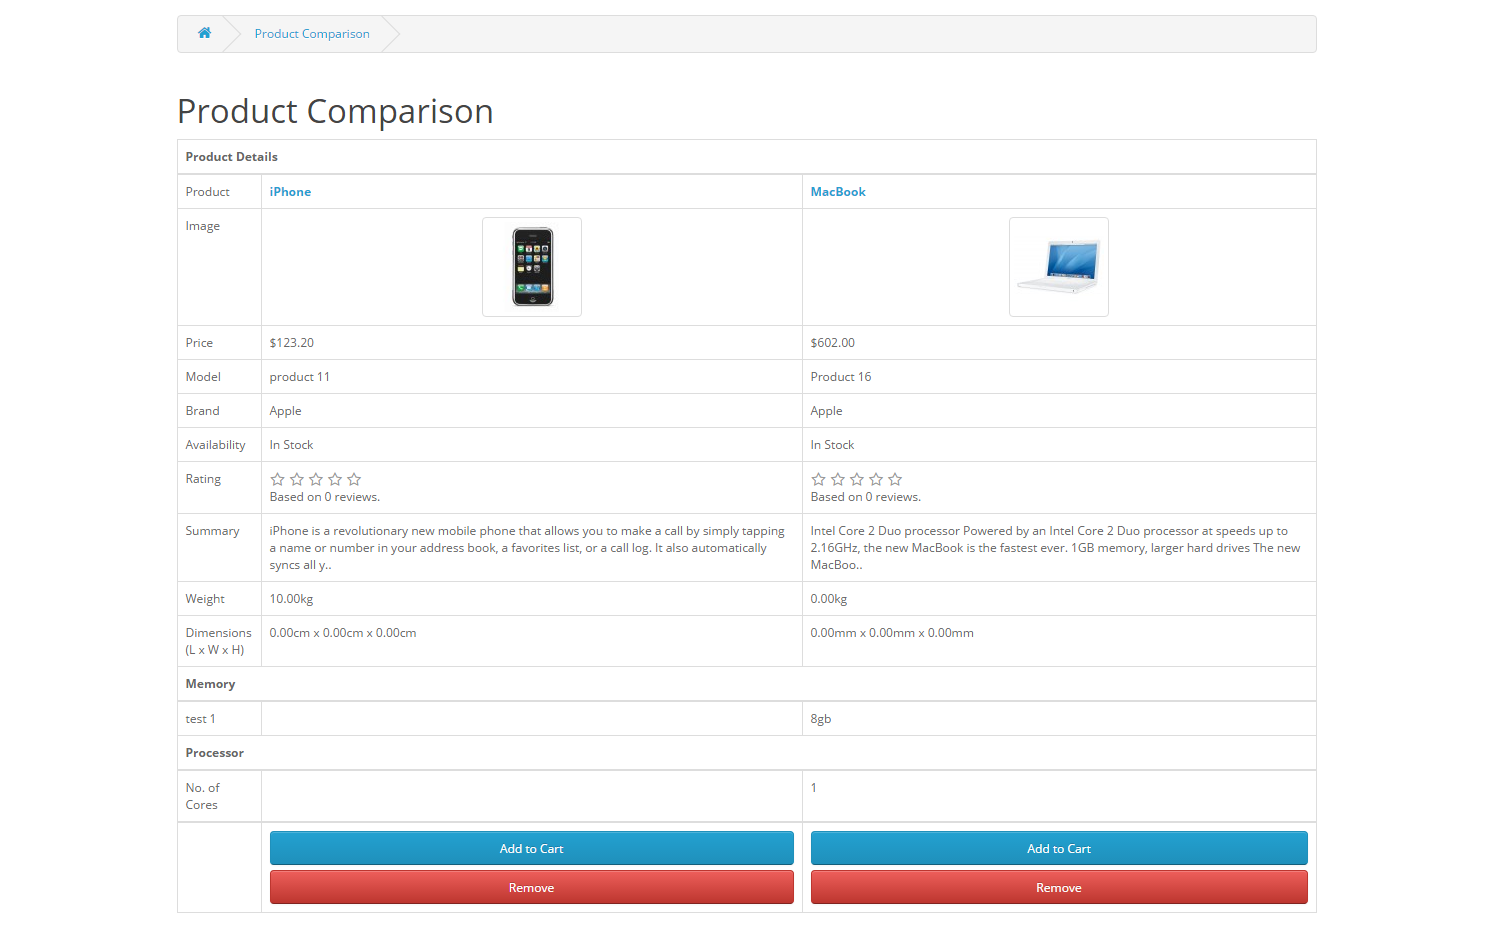
The customer is given the option to add one of the compared products to the cart if they want to. Pressing "Continue" will bring the user back to the home page.
Shopping Cart page
Once a customer adds a product to the cart, they can access the shopping cart in the header under "Shopping Cart".
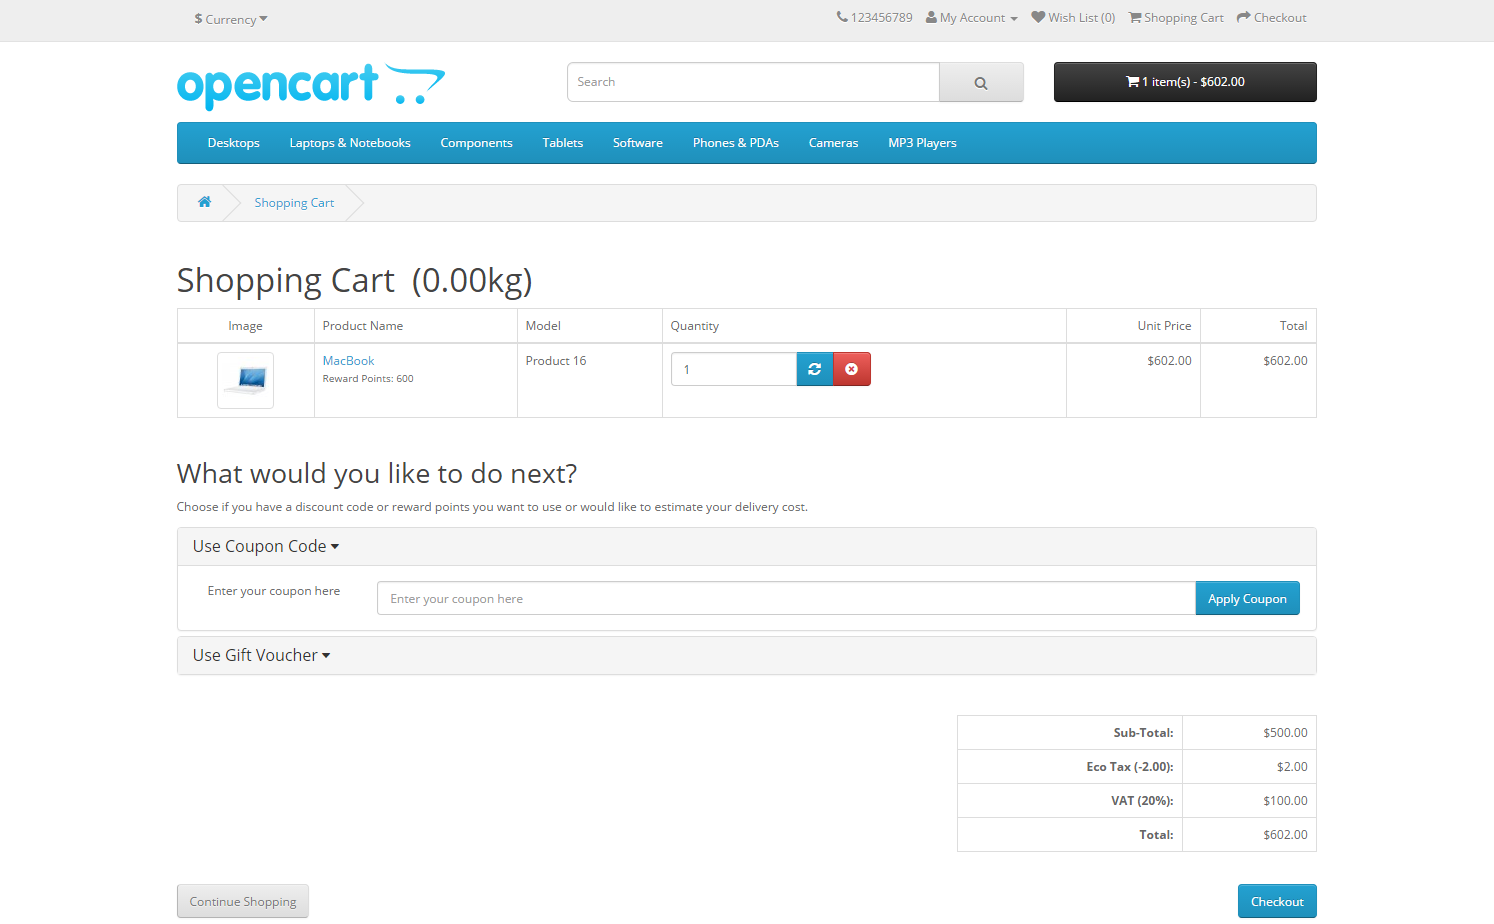
The shopping cart gives an overview of the product selected by including the categories "Image", "Product Name", "Model", "Quantity", "Unit Price", and "Total". The customer has an option to add a coupon code or gift voucher, or estimate shipping & taxes, before heading to the checkout. The "Continue Shopping" button links back to the homepage.
Creating an account
Before a customer can continue checking out a product from the shopping cart, the customer needs to select either guest checkout or log into their account. The guest checkout doesn't require log-in details. Returning customers may want to make an account with the store.
There are a few ways a customer can make an account:
- Checkout

Step 1 of the check out process allows the user to make an account before continuing with payment. Selecting "Register Account" will change Step 2 of checkout from Billing to Account & Billing details. Account & Billing asks for the same personal details as Billing, except that it asks for the user to create a password for their account. After Step 2 is completed, the customer may continue with the checkout process.
- Header- "My Account"
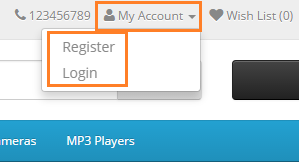
Clicking "My Account" in the header will show the option for customer to the Login or create account. This page gives the customer an option to log in if they already have an account, or create a new account. In the "New Customer" section the customer can click "Continue" under Register Account to be directed to the "Register an Account" page.
Checkout
Once a product has been added to the cart, the customer can continue to the checkout to make their product purchase. The Checkout page can be accessed in the header section of every page (found under the search box). Customer checkout is a simple process that can be completed in 6 steps.
- Step 1: Checkout options
The customer can log into or register their account (as explained above), or select guest checkout.
- Step 2: Billing details
Personal details including "First Name", "Last Name", "E-mail", and "Telephone" are filled into a form. It also requires the customer's address details.
- Step 3: Delivery details
In Billing Details, the user can check a box to indicate that the delivery details and billing details are the same. This will cause it to skip over this step to Delivery Method. If the delivery details are different from the billing details the customer can enter this information in a form in this section.
- Step 4: Delivery method
A method of shipping is selected here. A comment box is added for the customer to add comments about their order.
- Step 5: Payment method
The customer selects their method of payment here and may add comments in the comment box.
- Step 6: Confirm order
In this last step, the customer will see an overview of their purchase; including the product description, quantity, and price (with tax & shipping).